How to Configure a Webhook Trigger
This guide explains how to add and configure a webhook trigger for a workflow in GlobalAI. A webhook trigger creates a unique URL that can receive requests from external systems to start your workflow.
Prerequisites
Before you start, you should have a workflow ready to be triggered. You should also know which external application you want to connect to and what kind of data it will send.
Create the Webhook Trigger
First, you must add the trigger to your workflow.
- Navigate to your Workspace and open the workflow you want to edit.
- From the workflow editor, expand the contextual menu and select Webhook from the list.
- In the Webhook window that opens, click + Create Webhook. The webhook configuration form will open.

Configure the Webhook Trigger
Once the webhook creation form opens, you can customize its behavior using the following settings.
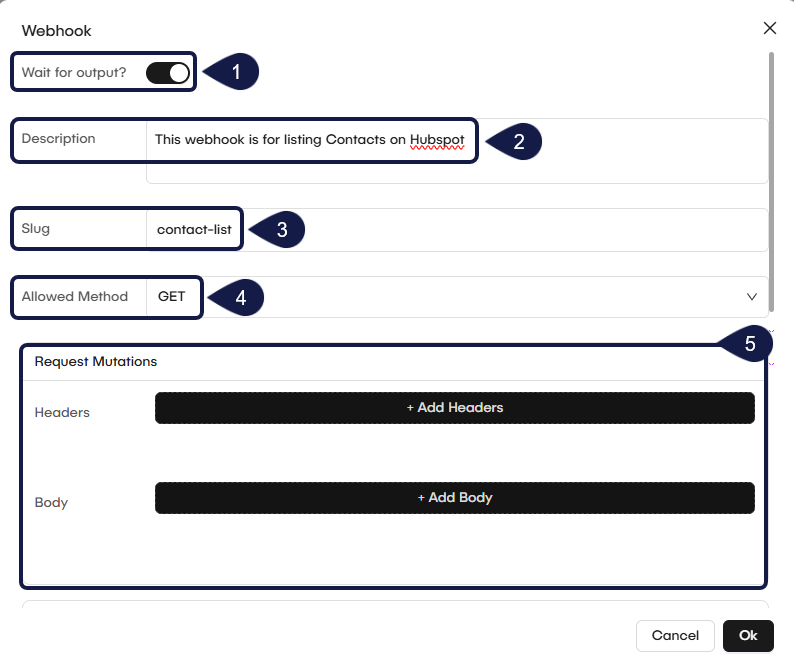
1. Wait for output (synchronous mode)
By default, a webhook is asynchronous: it receives the request and immediately starts the workflow without waiting for it to finish. You can change this behavior. Toggle the Wait for output? switch if you want the webhook to act like a synchronous endpoint. It will wait for the entire workflow to finish executing and then return the final result of the workflow in its response.
2. Add a description
Enter a plain-text, optional description for your webhook. This is for your internal reference so you (or your team) can remember what this trigger is for.
3. Set a user-friendly URL slug
Define a user friendly URL Slug that is easier to read and use. What you enter here (for example, contact-list) will be appended to the base URL to create your unique, webhook address.
4. Set allowed methods
Specify which HTTP methods the trigger will accept (for example, GET, POST, DELETE) by selecting it from the dropdown. Select the methods you want to allow. For example, if your external system will send data, you should select POST. If a request arrives using a method that is not on this list, it will be rejected.
5. Mutate the request
You can modify the headers or body of the request before it gets processed by the filters or the workflow. This is an optional, advanced feature.
Use the + Add Headers or + Add Body buttons to define modifications to the request.
6. Filter Incoming Events
You can use expressions to control which events start your workflow. This prevents the workflow from running every time the webhook receives a request.
- Locate the Filter Expression field in the trigger's configuration.
- Write an expression to check the data (payload) from the incoming request. For example, you can check
request.body.event_typeto see if it matches a specific value. - The workflow will only run if the data meets the conditions of your expression.
7. Set Custom Rejection Status Codes
If a request is rejected by your filter expression, GlobalAI sends back an HTTP status code.
- The problem: By default, the rejection code is
403(Forbidden). Some third-party platforms (like Slack or HubSpot) will monitor for these "failure" responses and may automatically disable your webhook if it receives too many403errors. - The solution: To prevent this, you can set the Rejection Status Code to
200(OK). This "tricks" the external system into thinking the call was successful, even when your filter expression correctly rejected the event and the workflow did not run.
8. Mutate the Response
You have advanced options to Mutate the response body or headers that are sent back when the webhook is called.
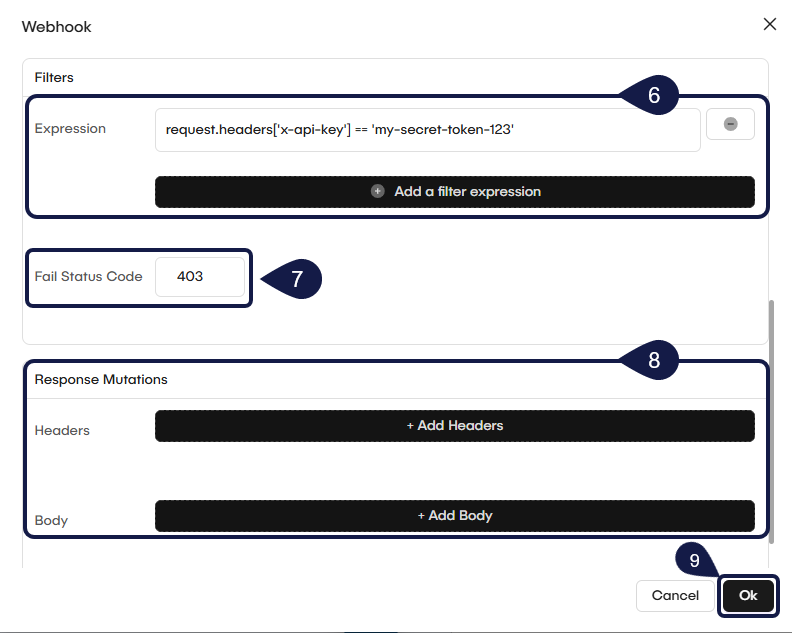
9. Save your changes
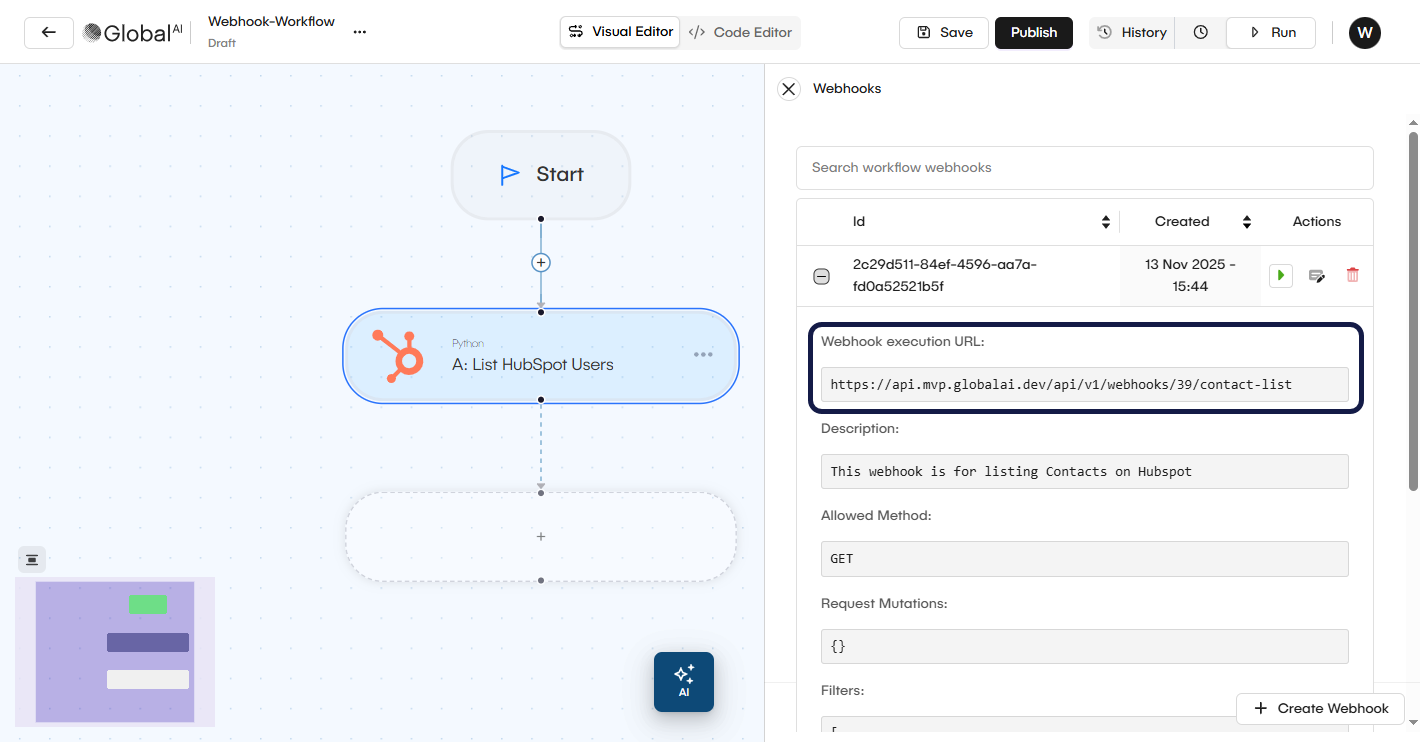
Once you finish applying your configurations, click Ok. Your webhook trigger is now configured. After you add the trigger, GlobalAI generates a Webhook URL. You will use this URL in your external application. You can test it by sending a request to the generated URL.
Related articles
Now that you know how to configure a Webhook Trigger, you can continue exploring these related documents.
Understand Automation Rules
Learn about other ways to start workflows based on different events and conditions.
How to use the Workflow Editor
Learn how to navigate and use the Workflow Editor to create and manage your workflows.
How to Create and Use a Module
Save time by building workflow components that you can reuse across multiple automations.